Key Takeaways
- Choose audio equipment around your riding habits, not maximum advertised output.
- Clarity, speaker placement, and tuning usually matter more than raw volume.
- Amplifiers, speakers, wiring, and battery capacity must work as one system.
- Weather sealing and vibration control are essential on a motorcycle.
- Safe listening means maintaining awareness of traffic, warnings, and changing road conditions.
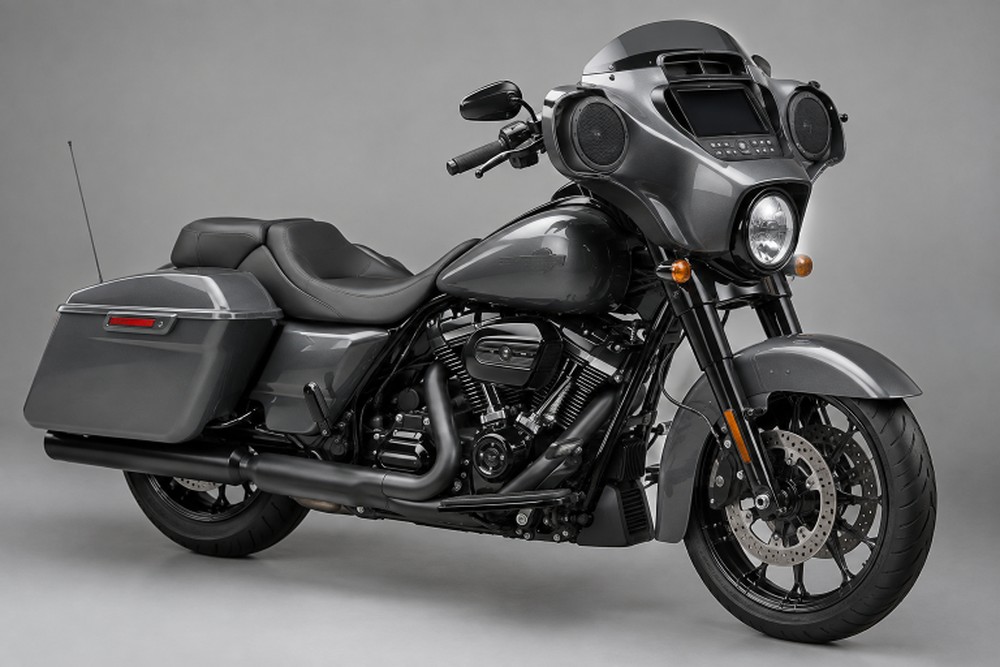
A better motorcycle audio setup is not about making music as loud as possible. It is about getting clear sound, dependable controls, and useful communication while preserving attention for the road. Riders comparing premium motorcycle audio systems should begin with a practical plan for how, where, and when the system will be used. It is also worth thinking about who will use the controls, whether a passenger will listen, and how often the motorcycle is parked outdoors. Those details influence component placement, control access, and the level of weather protection the installation needs. The best setup for a short urban commute may be very different from one built for long-distance touring or group rides. Start with the riding experience you want, then choose components that fit the motorcycle, electrical system, and real-world conditions. A well-planned system need not be complicated: even a modest arrangement can be effective when the parts are compatible, securely installed, and adjusted to the rider’s normal speed and environment.
Start With Riding Goals
Define the priority before buying anything. A music-focused setup may need fairing or saddlebag speakers and an amplifier. A communication-focused setup may prioritize clear voice prompts, a helmet communicator, and easy controls. A navigation-focused arrangement may need only reliable phone pairing and audible turn-by-turn directions. Consider where you ride most. City riders may value low-speed clarity and quick access to controls. Weekend riders may want fuller sound at moderate speeds. Long-distance riders should also consider charging, weather exposure, passenger comfort, and the ability to make adjustments while stopped. Ask whether speech matters more than bass, whether the bike has space for added components, and whether the system must work with an existing radio or a phone. It can help to make a short list of non-negotiables before shopping, such as glove-friendly buttons, Bluetooth connectivity, charging capability, or compatibility with a specific fairing and luggage configuration.
Understand Motorcycle Noise
Wind, engine vibration, tire noise, surrounding traffic, and helmet style can all change what you hear. At speed, turning up the volume may introduce harshness and distortion rather than improve detail. Better placement, cleaner amplification, and sensible equalizer settings are usually more effective solutions. Windshield height, rider position, and road surface type can also affect the sound reaching the rider, so a single volume setting may not be suitable for every trip. Helmet selection also affects the listening environment. The National Highway Traffic Safety Administration notes that wind noise can vary with helmet design, so test audio with the helmet and windscreen configuration you actually use. A setup that sounds balanced in a garage can become thin, muddy, or overly bright on the road. For that reason, use familiar music and spoken-word audio during testing; both can reveal problems that are easy to miss when listening to only one type of content.
Choose The Right Speakers
Speaker size matters, but it is only one part of the decision. Sensitivity indicates how efficiently a speaker converts available power into sound, while impedance must match the amplifier’s supported load. Frequency range can help describe what a speaker is designed to reproduce, but placement and installation quality still have a major effect on results. Before ordering, verify the physical dimensions and mounting pattern, as a speaker that fits electrically may still interfere with a panel, storage compartment, fork movement, or other motorcycle hardware.
Match Design To The Mounting Location
- Coaxial speakers combine the woofer and tweeter in one unit and can simplify installation.
- Component systems use separate drivers and can offer more placement flexibility, but require more planning.
- Fairing, lower-panel, and saddlebag locations need adequate mounting depth, panel clearance, and protected wiring.
- Weather-resistant cones, grilles, and terminals are better suited to exposed motorcycle use.
Secure mounting is part of speaker performance. An otherwise capable speaker can lose clarity if the surrounding panel vibrates, leaks air, or comes into contact with the speaker grille. Check that the mounting surface is rigid enough for the intended use, and use hardware that remains secure without overtightening, which can damage plastic panels or painted surfaces.
Match Amplifier Power
Use RMS power ratings when comparing speakers and amplifiers. RMS ratings are more useful for continuous operating expectations than peak-power figures. A properly matched amplifier can provide cleaner sound at normal levels because it gives speakers controlled power headroom, rather than forcing a small built-in source to operate at its limits. Two-channel amplifiers suit simple left-and-right setups. Four-channel models can support additional speaker locations or separate front and rear zones. Set the gain carefully because it is not a volume control. Crossovers can limit deep bass sent to smaller speakers, which may reduce distortion. A digital signal processor can be helpful when several speakers require individual-level or equalizer adjustments. When adding multiple speakers, confirm both the channel configuration and total impedance are within the amplifier manufacturer’s supported operating range.
Plan Wiring And Power
- Map the battery, fuse, amplifier, speakers, radio, and ground locations.
- Measure each cable route before cutting wire.
- Select a wire size for the amplifier’s current demand and the cable length.
- Place an appropriately rated fuse close to the battery on the power lead.
- Keep signal wiring separate from high-current power wiring where practical.
- Secure cables away from heat, moving parts, sharp edges, and pinch points.
Voltage drop, weak grounds, loose crimps, and undersized power wire can reduce output or create intermittent problems. Use solid ground points on clean, bare metal, protect connections with heat-shrink tubing where appropriate, and ensure the battery and charging system are in good condition before adding a high-demand accessory. Leave enough service length in accessible areas to inspect or replace components later, but avoid leaving excess wire loose where it can rub, vibrate, or become trapped under a seat or panel.
Protect Against Weather And Vibration
Motorcycles expose electronics to rain, dust, heat, road debris, and constant vibration. Use sealed connectors, grommets at pass-through points, protected cable routes, and corrosion-resistant hardware. Speakers should be mounted to stable surfaces so panels do not buzz or flex excessively. Recheck mounting bolts, wire ties, and accessible connections after rough roads, heavy rain, or the first long trip. If the bike is washed regularly, avoid directing high-pressure water at speaker grilles, seams, switches, and electrical connections unless the component manufacturer specifically states that such exposure is acceptable.
Set Safe Listening Levels
Audio should support a ride, not overwhelm it. Keep the volume moderate in town, reduce it near intersections and work zones, and avoid changing controls while moving. Pull over before adjusting wiring, pairing devices, or making detailed sound changes. Establishing a comfortable starting volume before leaving can reduce the temptation to make frequent adjustments in traffic. Hearing protection can reduce exhausting wind noise, but it should be selected and used thoughtfully. The National Institute on Deafness and Other Communication Disorders explains that long or repeated exposure to loud sound can damage hearing. Lower volume, shorter exposure, and appropriate hearing protection are more responsible than trying to overpower road noise. Riders should also account for local rules and remain able to notice important sounds, including emergency vehicles, horns, mechanical changes, and direct communication from others nearby.
Test And Tune The Setup
Begin at low volume and test each speaker separately. Listen for rattles, buzzing, weak channels, or distortion. Confirm that the controls are manageable with riding gloves, then set the gain conservatively and adjust the crossover points if small speakers sound strained. Test at several safe riding speeds. If the system is clear while parked but harsh at speed, reduce excessive treble, check speaker mounting, and reconsider placement before raising the volume. Make changes one at a time so it is easier to identify what improved or worsened the result. A small adjustment to speaker angle, crossover settings, or equalization can make more of a difference than a large increase in volume. After tuning, revisit the system on another ride, since changing weather, clothing, helmet vents, and road conditions can alter the listening experience.
Avoid Common Mistakes
- Buying speakers based only on maximum wattage or diameter.
- Skipping the fuse near the battery.
- Leaving exposed terminals or unprotected wire splices.
- Mounting speakers to panels that rattle.
- Ignoring battery health and charging capacity.
- Testing only while parked.
- Using excessive volume to cover poor tuning or poor placement.
Use A Final Checklist
- Are the speakers and connections suitable for outdoor use?
- Can the amplifier safely support the speaker load?
- Are power wires fused, routed safely, and secured?
- Are moisture-prone connections protected?
- Does the system remain clear at normal riding speeds?
- Can important traffic sounds and rider alerts still be noticed?
- Can the system be serviced without major disassembly?
Before the first extended ride, inspect the installation with the motorcycle off and again after a short test ride. Look for loose fasteners, rubbing wire insulation, warm connectors, and new panel noises. Keeping a simple record of wire routes, fuse ratings, and component settings can make future troubleshooting and maintenance much easier.
Build For Clearer, Safer Sound
A better motorcycle audio setup is the one that fits the bike and the rider. Plan around riding goals, prioritize clean sound over sheer volume, protect every component from the elements, and test the system in realistic conditions. Careful installation and steady tuning will usually produce a more satisfying result than simply choosing the largest available components. The goal is dependable audio that adds enjoyment and useful information without becoming a distraction or creating avoidable maintenance problems.
Conclusion
A well-planned motorcycle audio system should balance sound quality, durability, electrical capacity, and rider awareness. Instead of focusing only on maximum volume or power ratings, riders should consider their usual riding conditions, preferred audio use, speaker placement, weather exposure, and available battery capacity. Proper wiring, secure mounting, weather protection, and careful tuning can also help the system perform more reliably over time. Testing the setup at realistic riding speeds can reveal issues that may not be noticeable while parked. Most importantly, audio should remain secondary to safe riding. By choosing compatible components, installing them carefully, and keeping listening levels reasonable, riders can enjoy clearer music and communication while maintaining the attention needed for traffic, road conditions, and important sounds around them.