Key Takeaways
- Research flood exposure, drainage, soil, access, and local requirements before finalizing a floor plan.
- Design the foundation, roof, walls, openings, and connections as one coordinated system.
- Use materials and hardware selected for moisture, heat, wind, and salt exposure.
- Keep critical electrical and mechanical equipment out of vulnerable locations when possible.
- Make maintenance, storm preparation, and recovery access part of the original design.
Planning a coastal home means preparing for more than a beautiful view. Wind-driven rain, flooding, salt air, intense sun, and potential power outages can all shape the decisions that matter most. Working with experienced home builders early on can help homeowners integrate the site, structure, finishes, and utility systems into a single practical plan. A resilient coastal home does not need to look severe or overly technical. The best plans pair durable construction details with comfortable rooms, shaded outdoor areas, efficient cooling, and materials that are appropriate for the property’s conditions.
Why Coastal Home Planning Needs A Different Approach
Coastal properties can face overlapping hazards. A heavy storm may bring wind, rain, standing water, debris, and utility disruptions all at once. A home can have attractive finishes and impact-rated windows yet still be vulnerable if roof edges, garage doors, flashing, drainage routes, or utility connections receive too little attention.
Step One: Review The Lot Before Drawing The Floor Plan
Start with the land rather than the kitchen layout. Review flood zones, base flood elevation, soil conditions, natural drainage paths, setbacks, easements, road access, nearby canals or open water, and planned public drainage or shoreline work. Homeowners can use FEMA’s flood maps and planning resources as one starting point for understanding flood-related planning concerns. Early site research also creates room for personalized designs that fit the property without overlooking practical concerns such as elevated entries, storage placement, stairs, vehicle access, and drainage around outdoor living areas.
Step Two: Match The Foundation To The Site
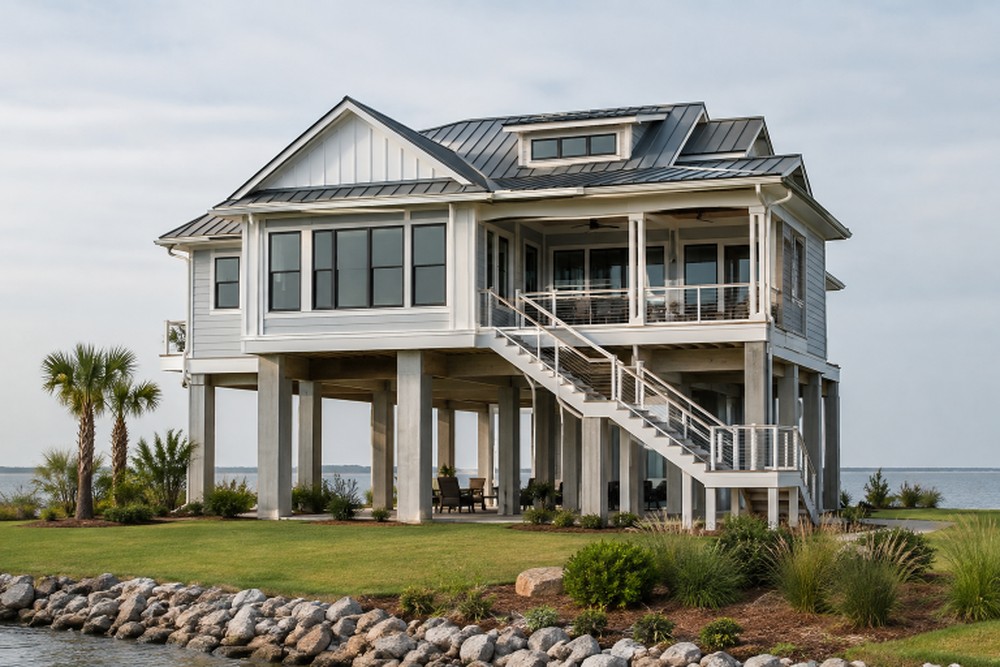
Slab, pier, pile, and elevated foundation systems each suit different conditions. The appropriate choice depends on the soil, expected water exposure, wind loads, local rules, and engineering review. In some locations, elevating the living space can reduce exposure to floodwater. Foundation decisions should happen early because they affect plumbing, stair design, parking, accessibility, storage, and the overall proportions of the home.
Step Three: Build A Strong Exterior Envelope
The exterior shell should work as a connected system, not as a collection of separate upgrades. Prioritize the following areas:
- Roof connections and edges: Use wind-appropriate attachment methods, carefully detailed flashing, and protected roof edges.
- Walls and foundation: Create a continuous load path so forces can transfer from the roof through the walls and into the foundation.
- Windows and doors: Select rated products or compatible storm protection based on local requirements and project needs.
- Large openings: Give garage doors, wide sliders, skylights, vents, and chimneys the reinforcement and sealing details they require.
- Water barriers: Include layered water-management details that can help limit intrusion if an exterior finish is damaged.
Step Four: Plan For Water Before Choosing Landscaping
Water should have a deliberate path away from the house. Coordinate grading, swales, gutters, downspouts, drains, and overflow routes before installing planting beds, retaining walls, patios, pool decks, or walkways. Pay close attention to thresholds, garage floors, plumbing penetrations, and low points near the foundation. Landscaping can support drainage, but it cannot correct poor grading or undersized drainage infrastructure.
Step Five: Choose Materials For Wind, Salt, And Heat
Material selection affects both appearance and maintenance. Coastal projects often benefit from corrosion-resistant fasteners and hardware, moisture-tolerant cladding, durable roofing, weather-suitable sealants, and outdoor fixtures designed for humid conditions. In areas likely to experience wet cleanup, water-resistant flooring can be a sensible choice. Even strong materials need care, including rinsing salt residue, checking sealants, inspecting for rust, and repairing small problems before they spread.
Step Six: Protect Mechanical And Electrical Systems
Locate electrical panels, water heaters, air-conditioning components, pumps, and other essential equipment where they are accessible and less exposed to water. Discuss surge protection, backup power, battery storage, and transfer equipment with qualified professionals. Generators must be installed and operated outdoors in accordance with the manufacturer’s instructions and applicable safety requirements. Clearly labeled water, gas, and electrical shutoffs can also simplify emergency response and repairs.
Step Seven: Design For Everyday Comfort
Storm-ready choices can improve ordinary daily life. Roof overhangs, shade, insulation, air sealing, efficient cooling, and well-considered window placement can support indoor comfort in hot, humid weather. Covered outdoor spaces provide usable shade under normal conditions and may offer a more comfortable gathering area during a limited-power period. Flexible rooms can serve as offices, guest rooms, storage for supplies, or a temporary recovery space after a storm.
Step Eight: Treat Outdoor Features As Part Of The Plan
Outdoor kitchens, pools, patios, docks, lifts, seawalls, railings, and shoreline landscaping all need their own review. Plan places to secure furniture, grills, planters, tools, and decorations. Provide drainage around hardscape, select corrosion-resistant components, and keep inspection access available around waterfront structures. Major shoreline work may require permits and engineering review, so it should not be treated as an afterthought.
Step Nine: Build A Simple Storm Preparation Plan
A well-designed home still needs an organized household plan. Monitor official alerts, clear gutters and drains, secure loose outdoor items, test backup equipment, photograph the home and major belongings, and keep records, medications, and emergency contacts ready to move with you. FEMA’s case study on stilt-built homes in the Florida Keys illustrates how elevation, code-compliant construction, and site-specific planning can work together in a coastal setting.
Common Mistakes To Avoid
- Choosing finishes before verifying flood, drainage, soil, and access conditions.
- Upgrading windows while ignoring roof connections, flashing, and garage doors.
- Putting valuable equipment or storage in low, exposed areas.
- Assuming a newer home does not need regular exterior and hardware inspections.
- Adding a deck, room, wall, or hardscape without reviewing drainage and structural effects.
- Waiting until severe weather is approaching to secure the property.
Questions To Ask Before Construction Or Remodeling
- What hazards affect this specific lot, and what local rules apply?
- What foundation and elevation approach is appropriate for the site?
- How will water move away from the home during a major rain event?
- Which openings, utilities, and outdoor features need additional protection?
- What maintenance will the selected materials require over time?
- Which decisions require an architect, engineer, contractor, or local official?
Frequently Asked Questions
Is A Storm-Ready Home Only For Waterfront Properties?
No. Homes farther inland may still face high winds, heavy rain, localized flooding, heat, and power outages. The correct approach depends on the site and local hazards.
Does A Stronger Home Have To Look Industrial?
No. Many resilience measures, including reinforced connections, improved flashing, protected openings, and thoughtful equipment placement, can be integrated into an inviting design.
Which Upgrade Should Come First?
Begin with the property’s largest risks. Site conditions, drainage, foundation needs, roof connections, openings, and essential systems usually deserve attention before cosmetic improvements.
Conclusion
A storm-ready coastal home is the result of connected decisions made early and maintained over time. By starting with the lot, managing water, strengthening the exterior shell, protecting critical equipment, and planning for daily comfort, homeowners can create a coastal space that is both welcoming and better prepared for severe weather. It is also important to consider how roofing, windows, doors, drainage, landscaping, and backup systems work together rather than treating each feature as a separate improvement. Regular inspections and maintenance can help identify problems before the next major storm arrives. By combining thoughtful design with ongoing upkeep, homeowners can create a coastal home that supports everyday living while being better equipped to handle changing weather conditions and the challenges that come with living near the coast.